Nanao MS9 to Wei Ya 3129A Chassis Swap Guide
Posted: December 8th, 2008, 4:19 pm
Edit: I originally thought I had an MS8 chassis because this was a stock Astro City cabinet, but for whatever reason, both of my cabinets came with MS9s instead. I believe this Wei Ya chassis should work with the MS8 as well, but please keep in mind that I swapped these with an MS9, not MS8 chassis.
I went into this feeling a little worried without a step by step tutorial, but it wasn't bad at all. This chassis swap would probably be the same with a New Astro City or Astro City 2 that has the Nanao MS9, but I did this with an original Astro City's stock chassis. Additionally, the Rodotron 666A chassis is reportedly the same as the Wei Ya 3129A so you should be able to use that instead.
First things first, disconnect the 15-pin video/power AMP connector, and the video adjust molex connector from the chassis. Now pull the entire frame out of the cabinet and set it on your work surface.
The first thing to do is discharge the anode. The best way to do this is with alligator clips. You need to connect one end to the earth bridle and the other to a screwdriver.
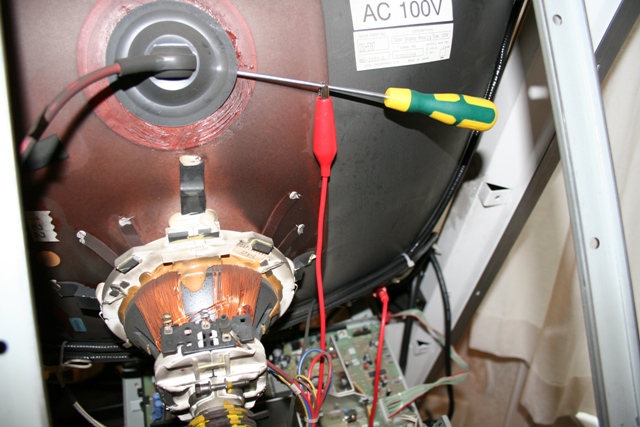
*image borrowed from invzim's yoke reading guide*
Only use one hand because you don't want to accidentally send a current through your chest if something goes wrong. Put the other in your pocket if you have to:
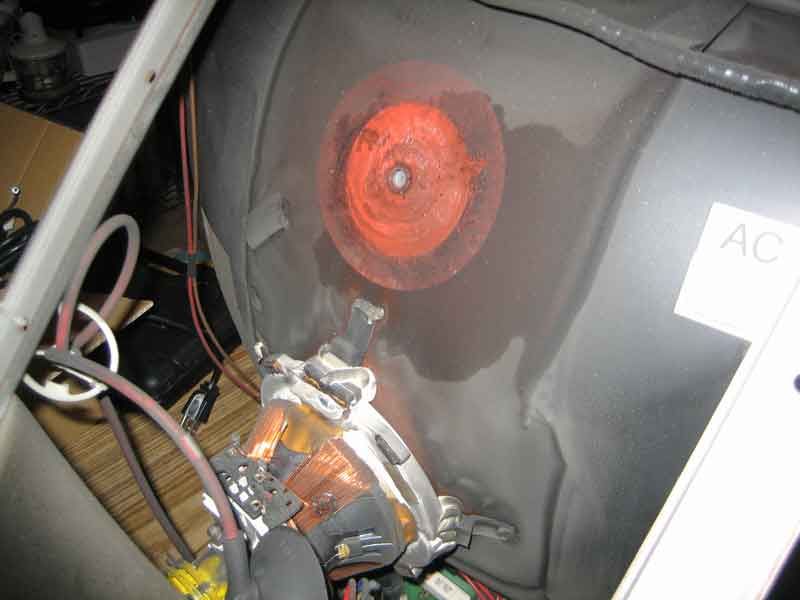
Stick the screwdriver under the cap until it touches metal. The anode should be discharged. You might hear a pop, but I didn't have any audible arcs. Take a look at the anode cap on your Wei Ya chassis so that you have an idea of what one looks like. The sides have to be pinched in to get it out of the tube, so you have to work one side out, and then the other. Gently pull the anode cap off by holding where the wire meets the back of the cap and kind of squeezing there and levering each side out. This thing is kind of suctioned on there, so if you hear a loud pop it's probably just air and not you getting violently electrocuted.
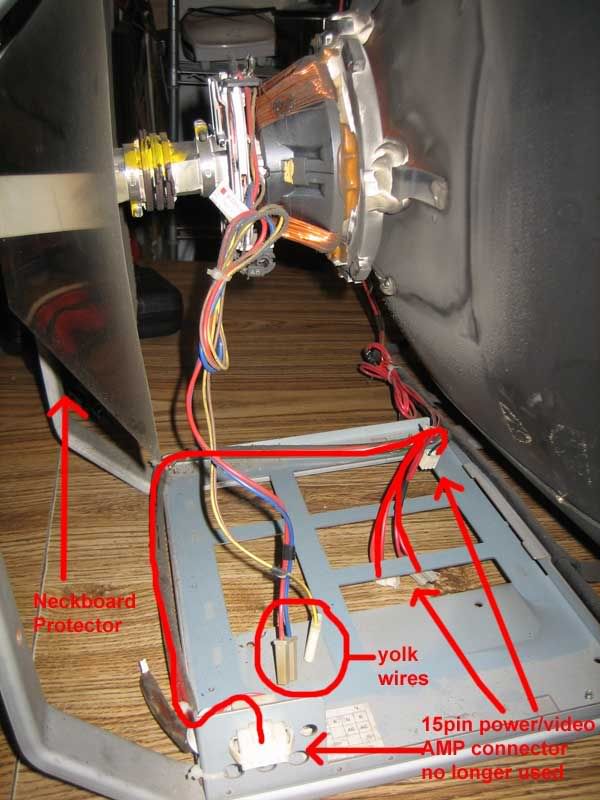
Now you're going to remove the neckboard. Your frame probably has a neck board protector plate on it, but you're going to have to remove this anyways to get the Wei Ya neckboard on there, so we may as well remove it now. Removing the two screws on either side will do the trick. Gently pry the neckboard off the pins and set it aside.
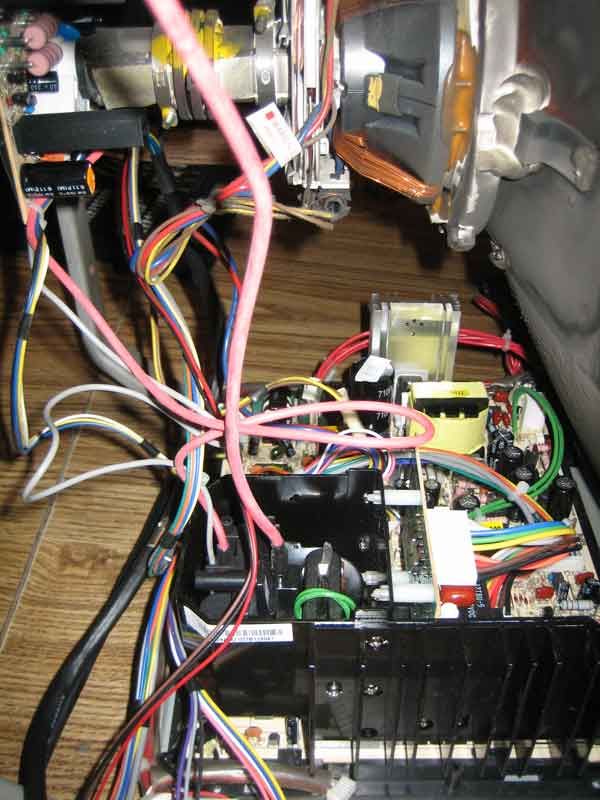
Now move on to the mainboard. Remove all of the connectors attached to it. The yoke connectors (the blue/red and green/yellow wires) are the only ones we're going to plug in to the Wei Ya, so you can tuck away the wires connected to the 15-pin AMP connector on the frame. They won't get in the way if they are just tucked to the side. Remove the three screws attaching the mainboard to the frame. You should be able to entirely remove the old chassis now.
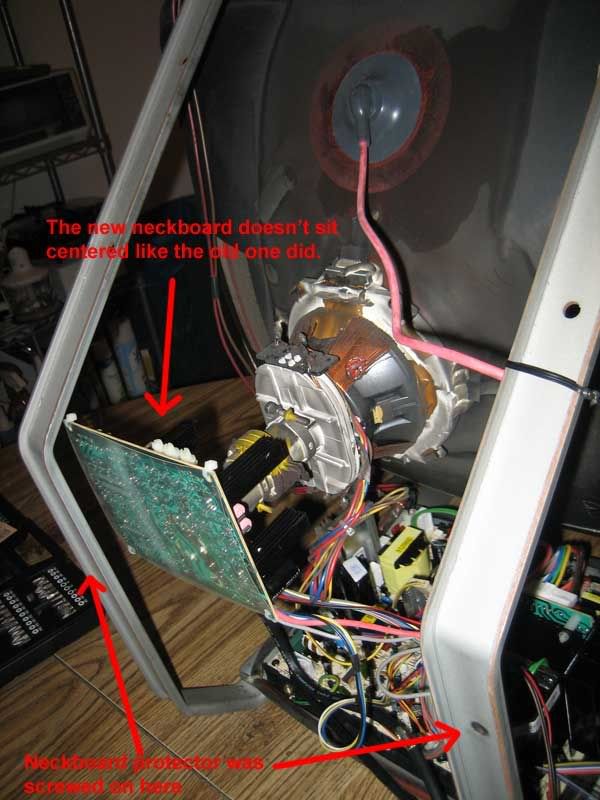
One thing I noticed about my Wei Ya, was that the mainboard was facing the opposite way on its plastic frame than the MS8 was facing. I don't know if it was assembled wrong, but there was a piece of plastic that was keeping me from sliding it into place fully so that the holes to screw it in lined up. I had to take a razor and shave the plastic away a little bit here to get it to work, but other than that it was fine.
Place the Wei Ya chassis onto the frame just how the original laid in and screw it down. You'll know you're putting it on backwards if the heatsink is touching the tube and preventing you from sliding it into place. Make sure to screw the ring connectors of the two grounding wires into place, the original chassis only used one, but the Wei Ya has two. Connect the yoke wires according to the manual (switching the order will cause the image to be mirrored horizontally, vertically, or both). You will have to use the 2pin adapter that came with your Wei Ya to connect the yellow and green ones, but the blue and red ones will be good to go.
Put the new neckboard on the neck of tube and connect your VGA video input cable. The manual shows how to connect it, and where to connect the grounding wire.
Make sure your new anode cap doesn't have a lot of dust on it and place it on just how you removed the other one, by putting one side in and then levering the other side in. You won't be able to pinch it together to get it in at all at once.
Your new chassis should be in place with the yoke connectors attached to the mainboard and the video input connected to the neckboard. Now connect the power cable to the mainboard and you are ready to test.
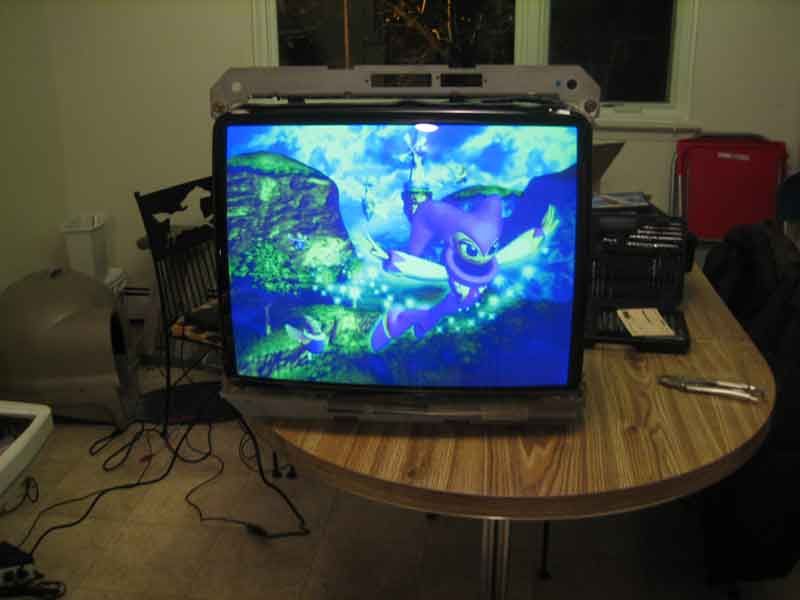
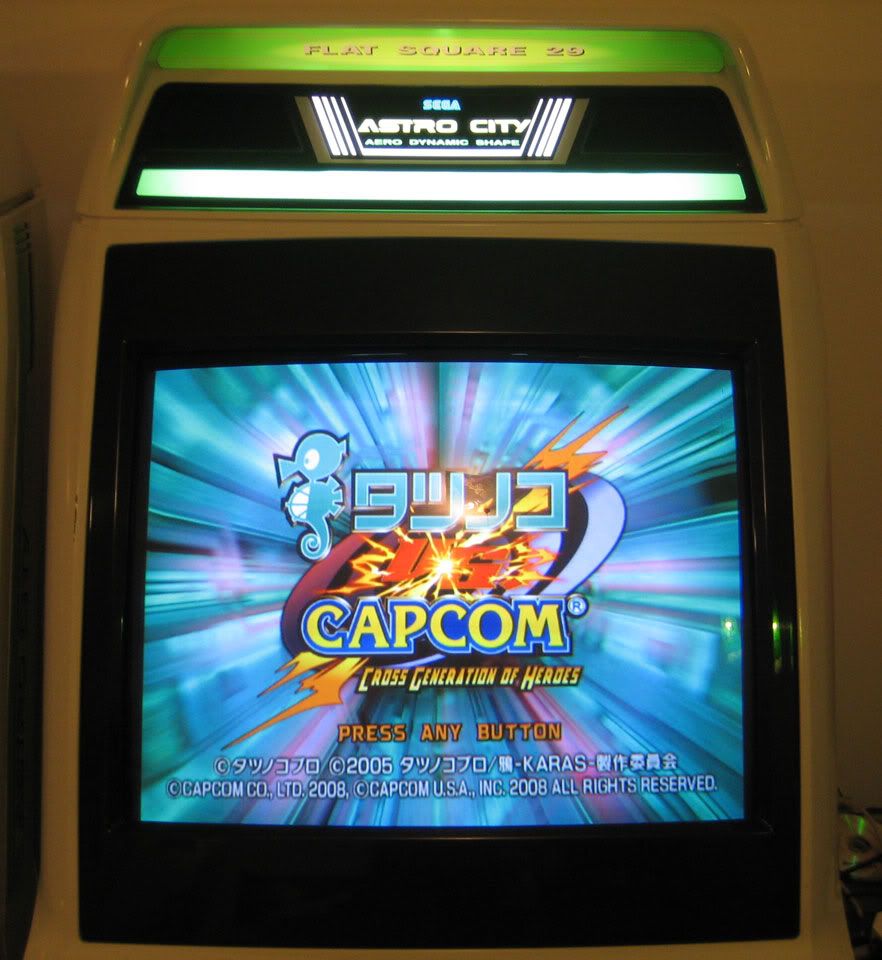
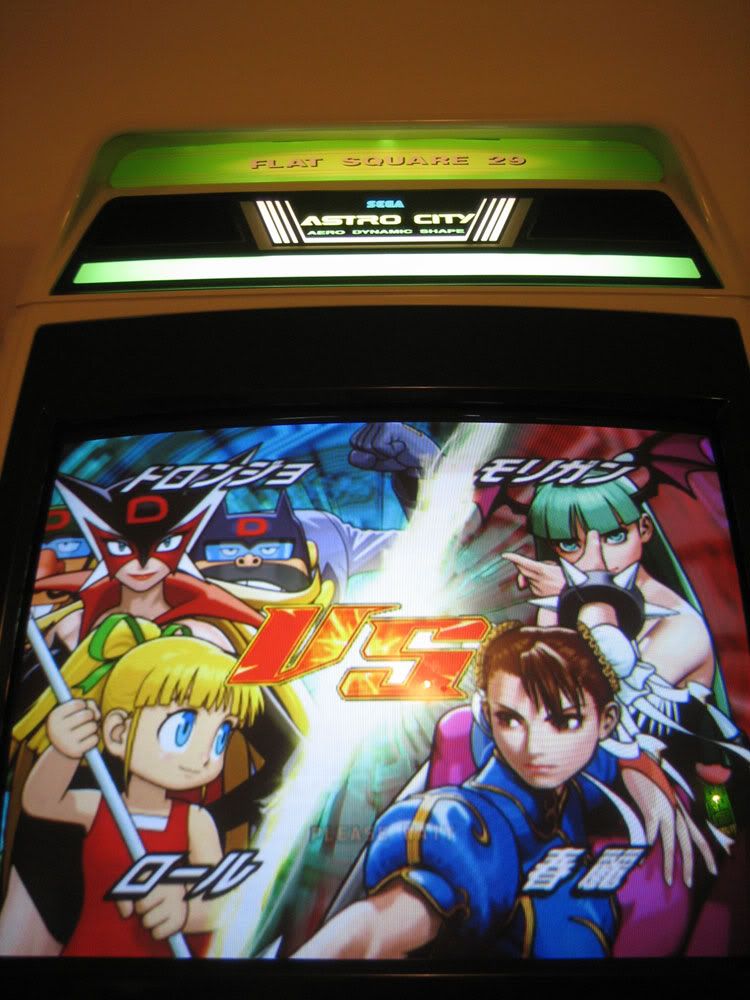
Plug in a VGA video source and turn the knobs on the top of the neckboard to adjust the color. To avoid risk of shock, it would probably be best to put the monitor back into the cab and use the rear service door of the cab to make these adjustments, but I had the monitor out of the cab without any problems.
(If you're using a PS2, put it into RGB mode or the RGB gain knobs won't be able to fix the color)
Once you're done, replace the old video adjustment board under the control panel with the new one. All done.
If for some reason, you don't have a manual, here is the page that shows where all the pots are:
http://www.dmauro.com/pub/weiya_manual_pots.gif
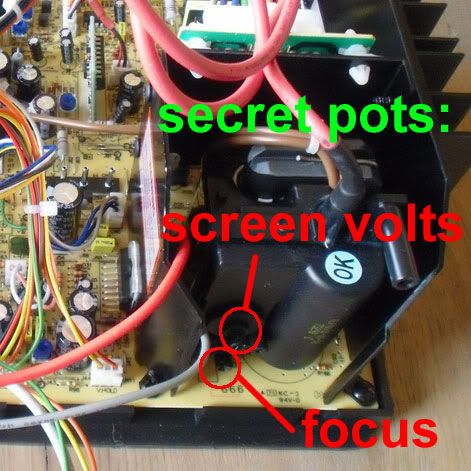
The manual does not show the location of the focus and screen volts pots on the flyback transformer, so here they are:
(I got this backwards, the screen volts are on bottom and focus is on top)
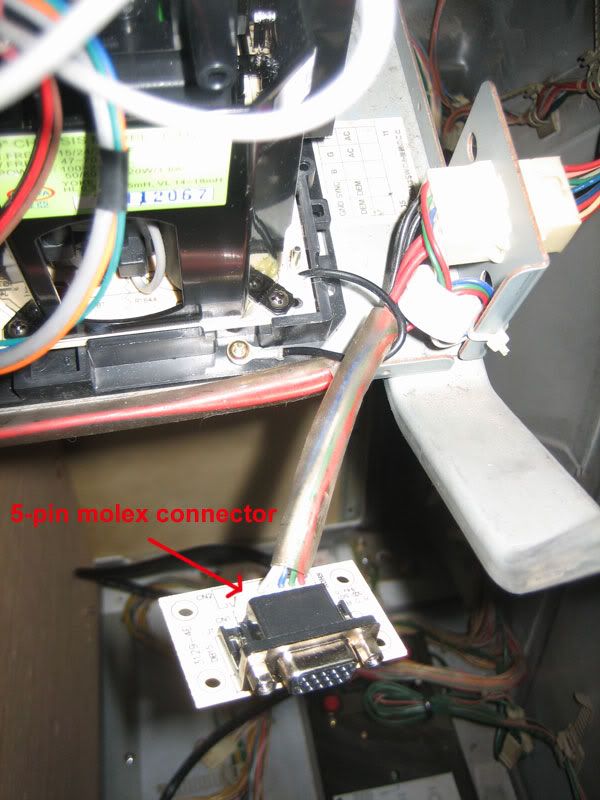
To connect the video in to the jamma video, you'll have to connect the D-sub adapter to the 5-pin molex connector coming out of the 15-pin TYCO connector that the old chassis was using. Now when you want to use the jamma video instead of plugging in a VGA connection, you simply connect this adapter to the monitor's VGA video in.
To connect the power to the PSU instead of using the provided three-prong plug, simply connect the power adapter to 2-pin connection coming form pins 6 and 7 of the 15 pin TYCO connector. Now connect this to the mainboard's 5-pin power connection and you're good to go.

I went into this feeling a little worried without a step by step tutorial, but it wasn't bad at all. This chassis swap would probably be the same with a New Astro City or Astro City 2 that has the Nanao MS9, but I did this with an original Astro City's stock chassis. Additionally, the Rodotron 666A chassis is reportedly the same as the Wei Ya 3129A so you should be able to use that instead.
First things first, disconnect the 15-pin video/power AMP connector, and the video adjust molex connector from the chassis. Now pull the entire frame out of the cabinet and set it on your work surface.
The first thing to do is discharge the anode. The best way to do this is with alligator clips. You need to connect one end to the earth bridle and the other to a screwdriver.
*image borrowed from invzim's yoke reading guide*
Only use one hand because you don't want to accidentally send a current through your chest if something goes wrong. Put the other in your pocket if you have to:
Stick the screwdriver under the cap until it touches metal. The anode should be discharged. You might hear a pop, but I didn't have any audible arcs. Take a look at the anode cap on your Wei Ya chassis so that you have an idea of what one looks like. The sides have to be pinched in to get it out of the tube, so you have to work one side out, and then the other. Gently pull the anode cap off by holding where the wire meets the back of the cap and kind of squeezing there and levering each side out. This thing is kind of suctioned on there, so if you hear a loud pop it's probably just air and not you getting violently electrocuted.
Now you're going to remove the neckboard. Your frame probably has a neck board protector plate on it, but you're going to have to remove this anyways to get the Wei Ya neckboard on there, so we may as well remove it now. Removing the two screws on either side will do the trick. Gently pry the neckboard off the pins and set it aside.
Now move on to the mainboard. Remove all of the connectors attached to it. The yoke connectors (the blue/red and green/yellow wires) are the only ones we're going to plug in to the Wei Ya, so you can tuck away the wires connected to the 15-pin AMP connector on the frame. They won't get in the way if they are just tucked to the side. Remove the three screws attaching the mainboard to the frame. You should be able to entirely remove the old chassis now.
One thing I noticed about my Wei Ya, was that the mainboard was facing the opposite way on its plastic frame than the MS8 was facing. I don't know if it was assembled wrong, but there was a piece of plastic that was keeping me from sliding it into place fully so that the holes to screw it in lined up. I had to take a razor and shave the plastic away a little bit here to get it to work, but other than that it was fine.
Place the Wei Ya chassis onto the frame just how the original laid in and screw it down. You'll know you're putting it on backwards if the heatsink is touching the tube and preventing you from sliding it into place. Make sure to screw the ring connectors of the two grounding wires into place, the original chassis only used one, but the Wei Ya has two. Connect the yoke wires according to the manual (switching the order will cause the image to be mirrored horizontally, vertically, or both). You will have to use the 2pin adapter that came with your Wei Ya to connect the yellow and green ones, but the blue and red ones will be good to go.
Put the new neckboard on the neck of tube and connect your VGA video input cable. The manual shows how to connect it, and where to connect the grounding wire.
Make sure your new anode cap doesn't have a lot of dust on it and place it on just how you removed the other one, by putting one side in and then levering the other side in. You won't be able to pinch it together to get it in at all at once.
Your new chassis should be in place with the yoke connectors attached to the mainboard and the video input connected to the neckboard. Now connect the power cable to the mainboard and you are ready to test.
Plug in a VGA video source and turn the knobs on the top of the neckboard to adjust the color. To avoid risk of shock, it would probably be best to put the monitor back into the cab and use the rear service door of the cab to make these adjustments, but I had the monitor out of the cab without any problems.
(If you're using a PS2, put it into RGB mode or the RGB gain knobs won't be able to fix the color)
Once you're done, replace the old video adjustment board under the control panel with the new one. All done.
If for some reason, you don't have a manual, here is the page that shows where all the pots are:
http://www.dmauro.com/pub/weiya_manual_pots.gif
The manual does not show the location of the focus and screen volts pots on the flyback transformer, so here they are:
(I got this backwards, the screen volts are on bottom and focus is on top)
To connect the video in to the jamma video, you'll have to connect the D-sub adapter to the 5-pin molex connector coming out of the 15-pin TYCO connector that the old chassis was using. Now when you want to use the jamma video instead of plugging in a VGA connection, you simply connect this adapter to the monitor's VGA video in.
To connect the power to the PSU instead of using the provided three-prong plug, simply connect the power adapter to 2-pin connection coming form pins 6 and 7 of the 15 pin TYCO connector. Now connect this to the mainboard's 5-pin power connection and you're good to go.